
Python Script: Network Scanner
Using Python, I demonstrate my ability to create a network scanner for discovering users. This allows me to discover all clients on the network and display the IP and MAC address for each. I will then be able to use this information for a red team exercise on network penetration in a separate post. Many pre-built tools exist for the purpose of network scanning, such as netdiscover, which can passively detect online hosts, as well as nmap. However, for this project I will create a network scanning script from scratch and break down the various elements of the packets being sent out.
First, on my Kali terminal I execute the following command to read the network information.
ifconfig
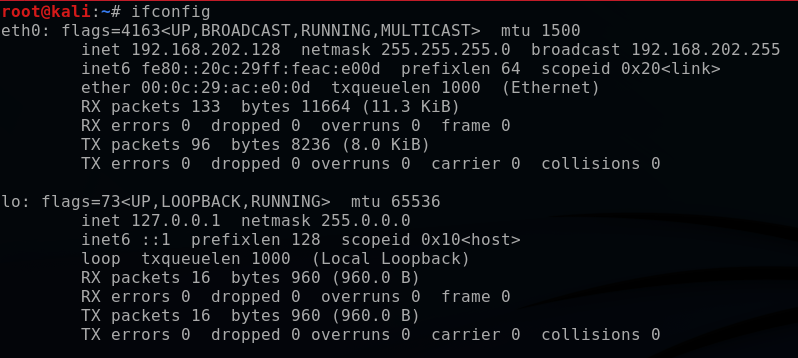
My Kali is setup on a VM (virtual machine). The VM network connection is setup on NAT with my host machine, and eth0 is this virtual interface. As far as this Kali box is concerned, it thinks that it is on a real ethernet wired network.
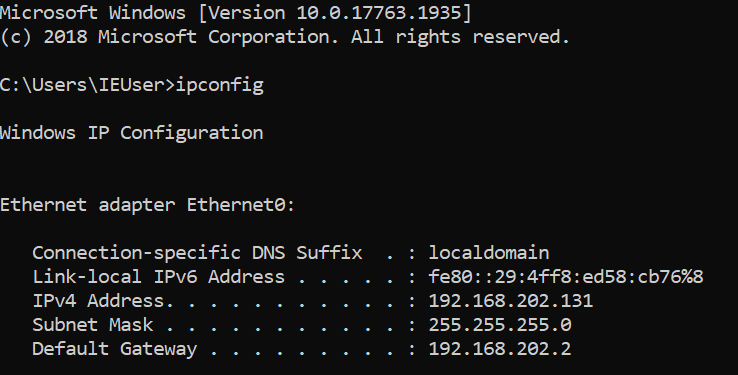
Secondly, I have setup a Windows 10 virtual machine that is also configured on the same NAT network. The IP address for this endpoint is 192.168.202.131. I will come back to this IP at the end of this post when I execute the script.
As I mentioned, my home-made network scanner will be analogous to netdiscover, a built in tool on Kali. Using netdiscover, I can scan my subnet (subnet mask 255.255.255.0) to send out ARP requests and reveal the following addresses:
- Network address (192.168.202.1)
- Default gateway (192.168.202.2),
- Broadcast address (192.168.202.254)
- Windows 10 VM (192.168.202.131).
netdiscover -r 192.168.202.1/24
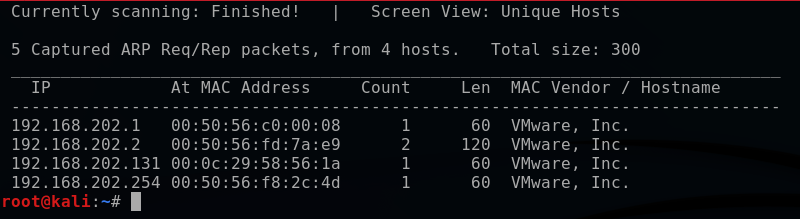
How exactly did netdiscover this compile? Well, in order for a client to communicate to another client on the same network, it needs to know its MAC address. It does this by sending out an ARP (Address Resolution Protocol) request to the broadcast MAC address (i.e. who has 192.168.202.131) which will then go out to all clients on the network. All clients that do not have this IP address will ignore this packet, and the true client will return an ARP response packet with their MAC address back to the original client.
Now that I have explained the ARP protocol framework via netdiscover, I will replicate this ARP messaging across my subnet using PyCharm as the IDE to build it out. Let’s walkthrough the finished code, below, and break it all down step-by-step.
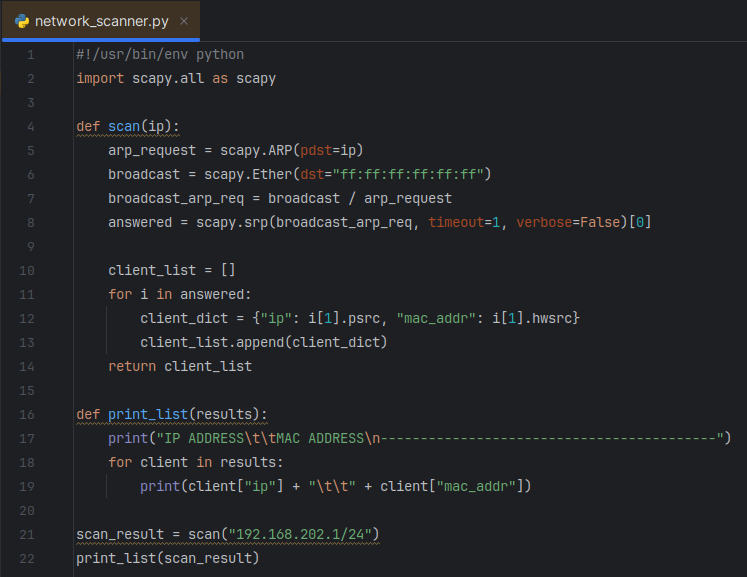
On the first line, I include a shebang which defines the absolute path for the code interpreter. This tells the shell where to find the interpreter for the rest of the file without needing to prefix the command in the terminal with python, for example.

On the 2nd line, I import all functions from the scapy module and rename them to “scapy” for simplicity. Scapy is a powerful packet manipulation tool to craft unique packets and send them out on the network. I will structure my code with the following steps:
- Create an ARP request directed to the broadcast MAC asking for an IP
- Send ARP request packets to the subnet and receive responses
- Parse the responses into an ARP cache table
- Print result
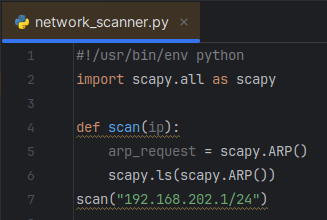
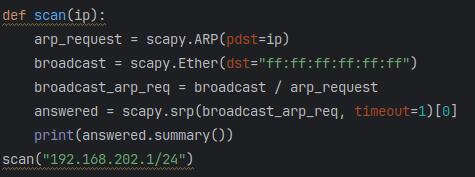
I setup a function, defined as scan, that passes through a variable “ip” (IP address). The scapy.ARPing command will be used to send an ARP request to that IP address.

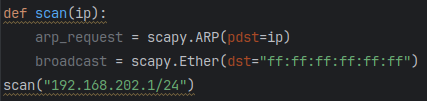
The field pdst (destination IP) is specified as a variable in the command scapy.ARP and I set pdst equal to the ip input variable. This pdst field was identified by first using scapy.ls(scapy.ARP()) to scan my network and discover the various ARP fields that are available, as shown below.

The ARP request destination MAC needs to be sent to the broadcast MAC, so next I create an ethernet frame using scapy.Ether() that will append the ARP request to it. Once again, I use the scapy.ls function with the scapy.Ether class to discover the available ethernet packet fields. This shows the field dst is designated for the destination MAC address.
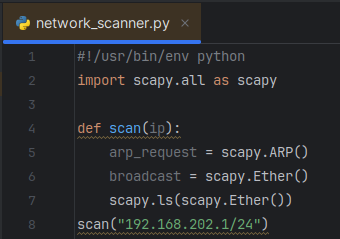

Now the broadcast variable can be defined with the dst field set to the broadcast MAC address, which is a virtual address ff:ff:ff:ff:ff:ff.
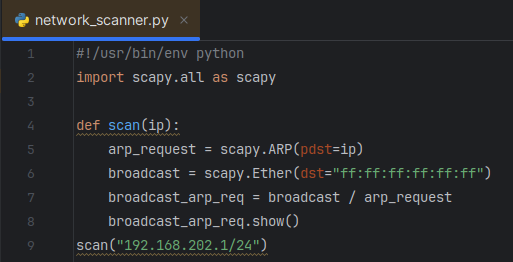
Next, the ARP request and broadcast packets can be combined into a single packet, and I will temporarily use the scapy class .show() to show the ethernet and ARP aspects of the packet.

To send this packet, I will use the scapy function scapy.srp using the variable “broadcast_arp_req”. The scapy documentation explains that scapy.srp will return two lists: answered and unanswered packets. I will append element[0] to the end of the variable in order to only output the answered list. Additionally, I set a timeout variable of 1 second so that the function moves on if it doesn’t receive a response, and then print out a summary to verify the answered packets are being captured.

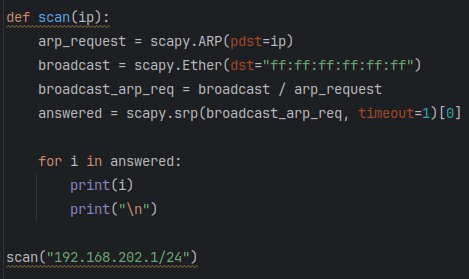
Now that the answered packet data is captured, I want to be able to parse out just the IP and MAC addresses into a dictionary as a key:value pair. In order to do this, I will setup a for loop to iterate through each element in the list “answered”. To distinguish how to parse each element, I will first quickly setup the for loop to print out each one.
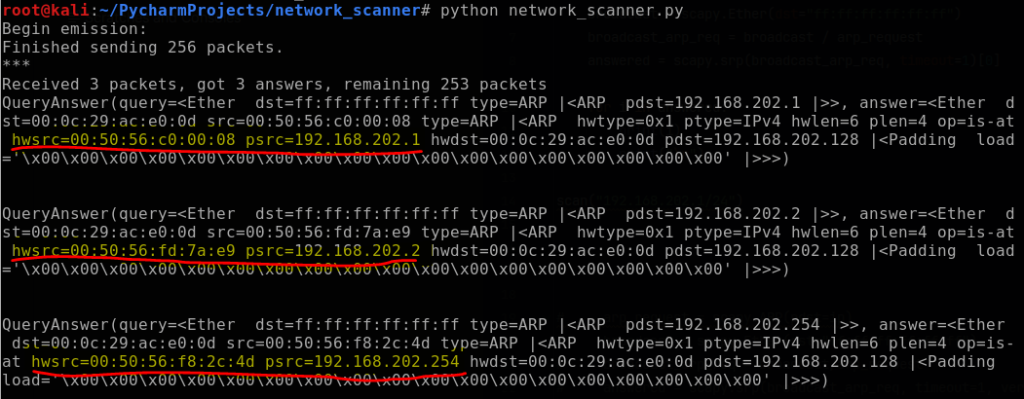
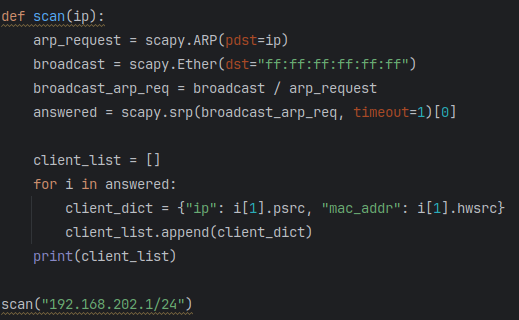
Each element is a list of couples (packet sent, answer). To capture the IP and MAC addresses highlighted above, I can call out the field names (hwsrc and psrc) from element [1]. I proceed by creating an empty client list outside of the for loop, and then inside the for loop will append the client dictionary (IP address: MAC address) to it. Lastly, it will print the completed client list as shown below.

The function is working great! As a final step, I create a separate function called “print_list” that takes in the variable “results” and will print out a table. This will be another for loop in which I iterate through each dictionary of the “client_list”.

Now with that print function complete, I can run the scan function and set it to a variable called “scan_result”. Then, I pass “scan_result” through the function “print_list”.

And with that, voilà! The network scanner script is complete. I will spin my Windows 10 VM back up and run the python script from my Kali terminal.

Success! The network scanner identified the Windows 10 VM (192.168.202.131) on the NAT network.

Related Posts

Pentesting in Action

Python: ARP Spoofing Program